
| Home | |
| Replacement Boat - attempt 3 |
 |
|
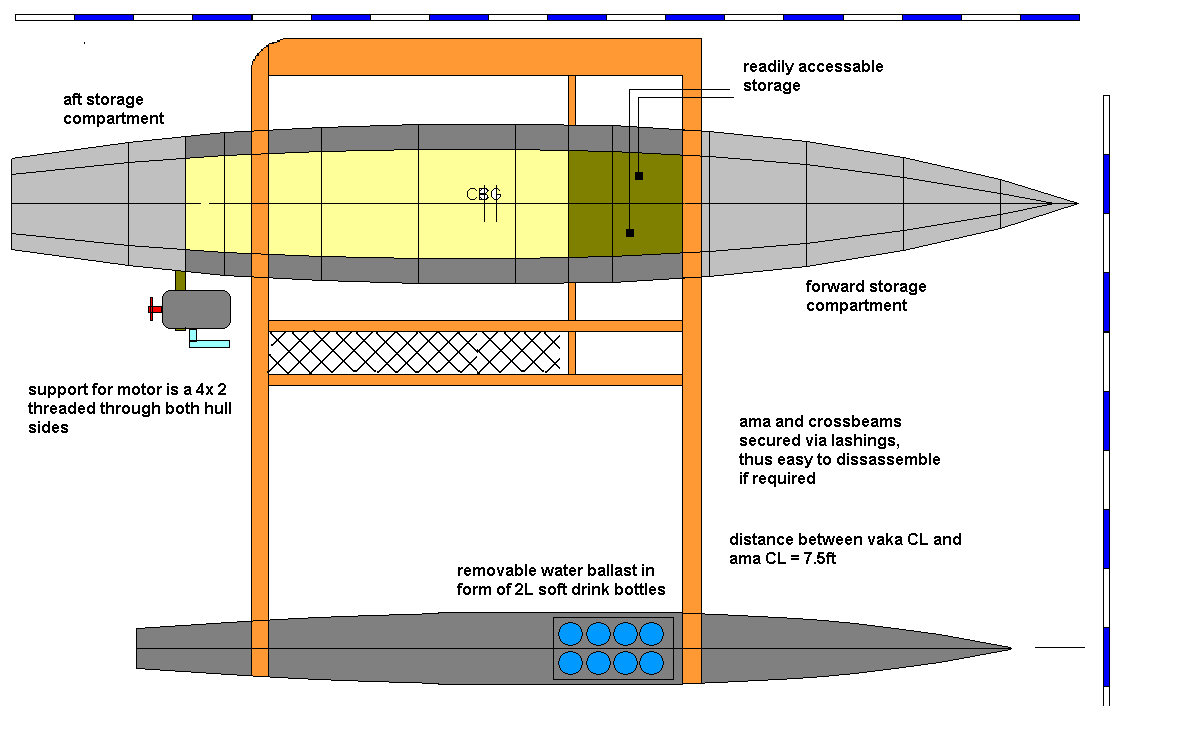
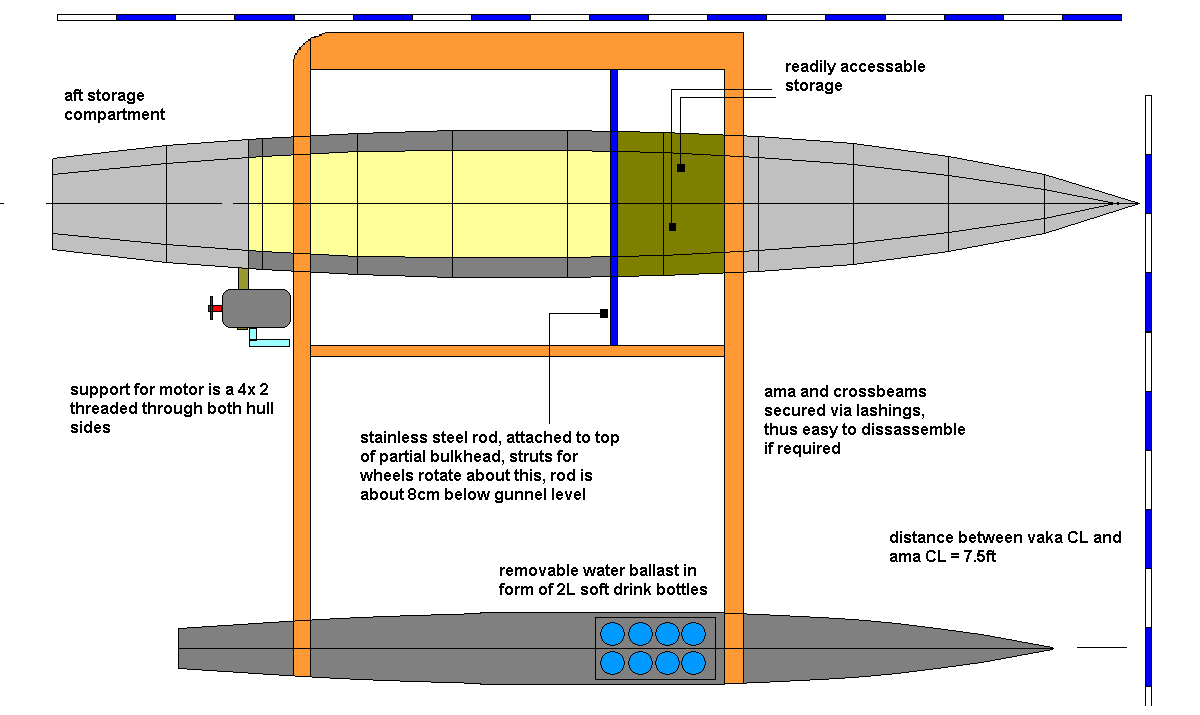
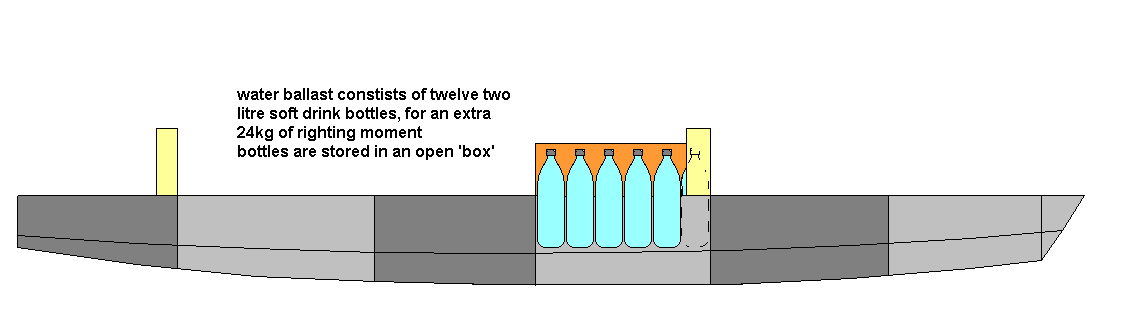
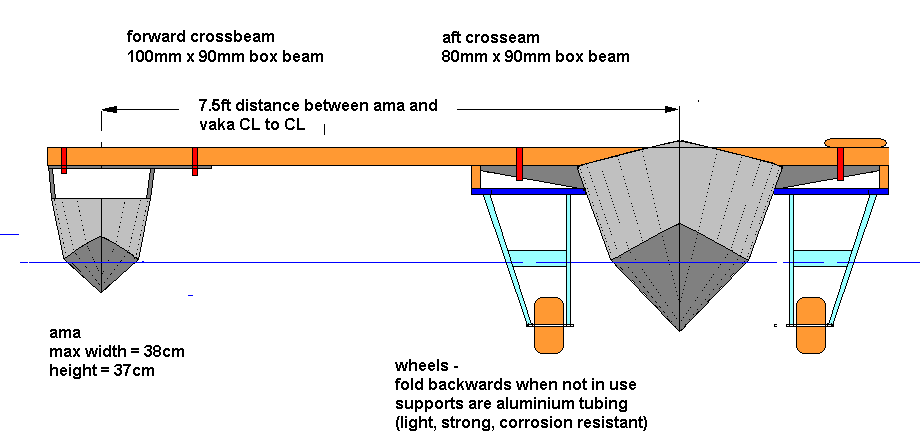
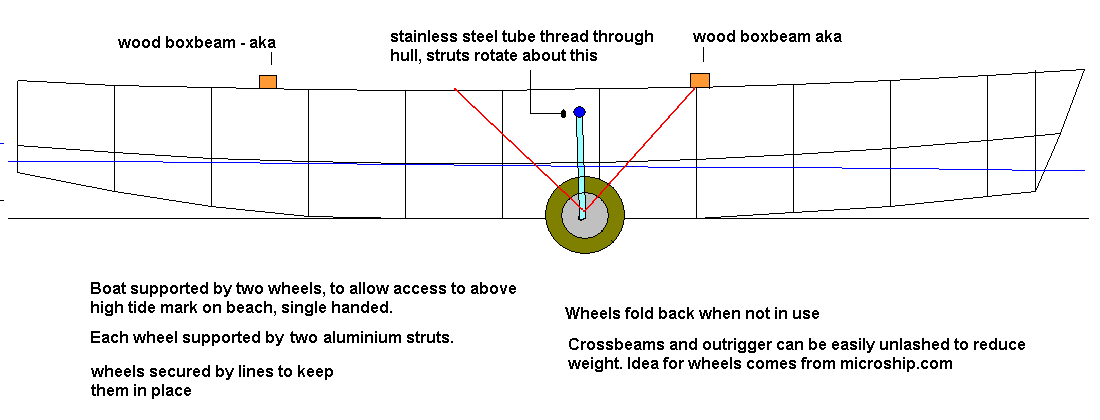
Replacement Boat attempt 3 NOTE THIS PAGE HAS BEEN COMPLETELY UPDATED - FOR NEW INFORMATION PLEASE SEE HERE - r_boat_4.html Is now April 2011, and have made decision to bit the bullet and finally build a nice coastal boat. Here are some early sketches. Not shown are the wheels that will fit under the crossbeams and pivot out when not in use. Because I want to get up a beach unassisted when neccessary the weight will be too much for me to drag. My feeling is that a pair of wheels should give me a lot of flexibility. Note that the crossbeams and outrigger can be dissassembled easily as connection is via lashings and large diameter dowels. Based on my first boat, the outrigger will be lighter, yet be able of carrying water ballast (blue area) by way of 2L softdrink bottles filled with fresh water in a small raised open box. Crossbeams will be lighter than my first boat where I had over-engineered them. My best guess at present is box beams of 90mm x 90mm. The plan for this week is to buy some timber and start building little things. I will start with simple rectangular hatch covers, then simple crossbeams. Once all the small items have been built only then will I start on the hull itself. By starting with the small items first, it gives me time to refine the lines of this boat before I start building. I am giving myself 6 months to build.
Rig One method for the mast of a dipping lug is a conventional unstayed vertical mast. The other option is a bipod. A bipod would allow me to pivot the rig forwards and aft a little to change the center of effort. In addition tacking with a dipping lugsail suspended from a bipod would be simple. I can leave this detail till later |
|
News 14 April 2011
Why 18ft, and why this width?
Why I chose not to go with a proa
Other possible changes
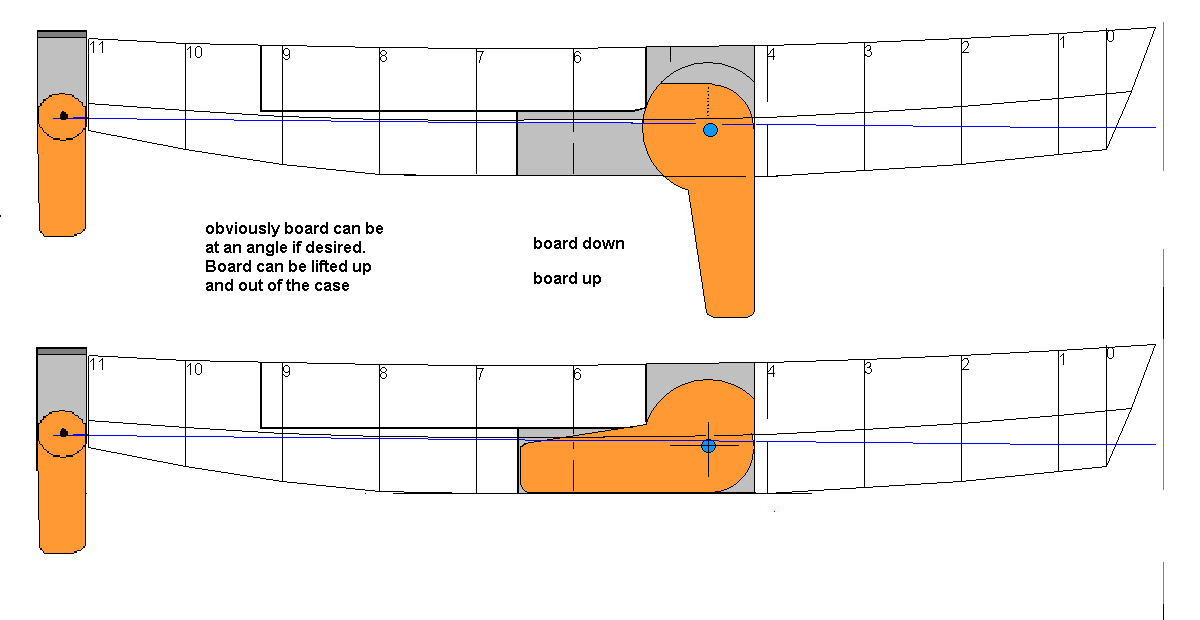
Changes - 24 April 2011 The other change recommended was a higher aspect ratio board. I decided against following this advice as I thought that the lower aspect board would be better at lower hullspeeds, additionally the lower aspect board would be more robust. It must be remembered that this is a design optimised for cruising as opposed to pure speed
News 24 April 2011
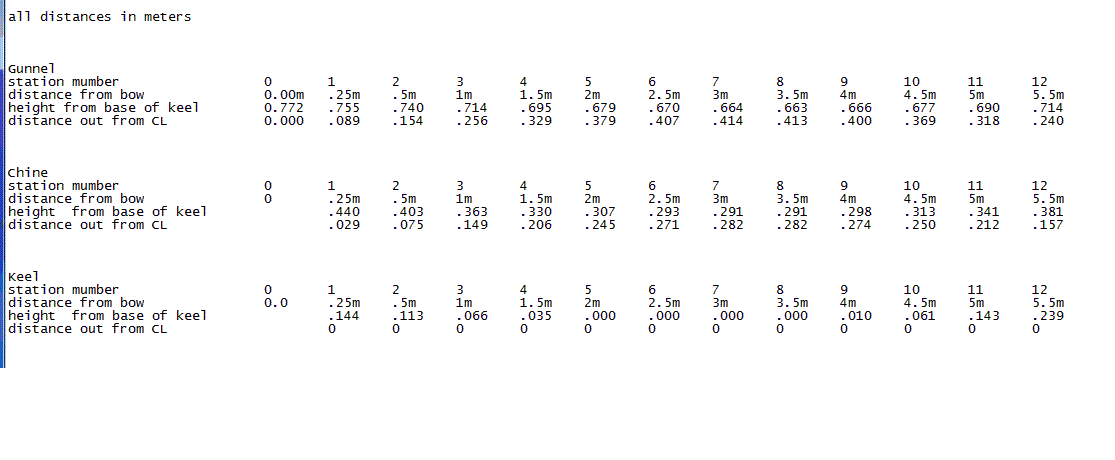
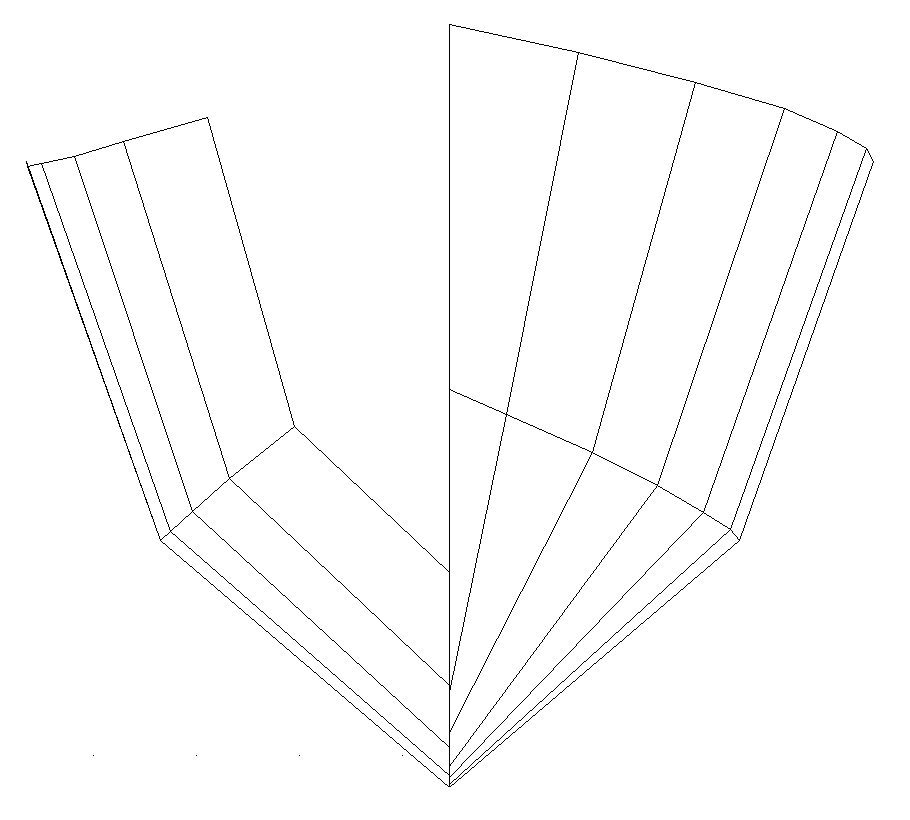
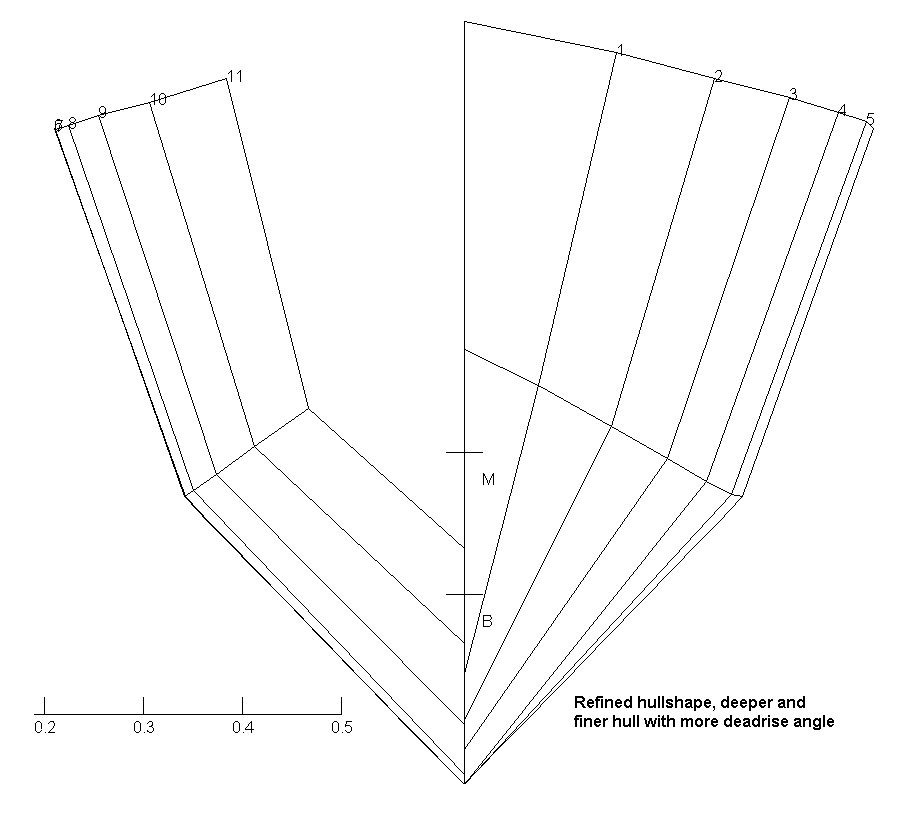
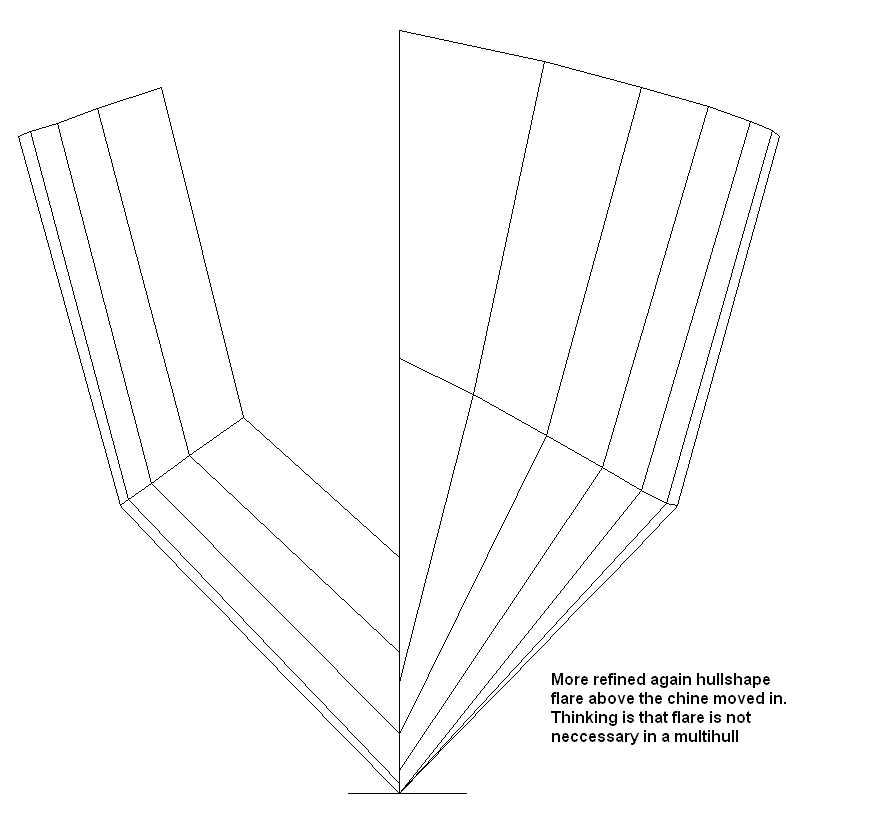
News 2 May 2011 I was experiementing with the little handheld router on Saturday, should be useful in making curved over edges, it is a nice simple tool once you have the hang of it. Based on feedback, I have both lenghened the main hull by a few inches. I have also reduced the flare angle above the chine. Angles below the chine remain unchanged. I think this is better, adding another 4 inches or so of length is a modest increase in weight, but assists greatly in obtaining better trim. I might add another 2 inches before I am finished, but no more. Particulars of these hull lines based on 250kg displacement
What I have tried to do is go with a simple easy-to-build hullshape. I have tried to make the forefoot fine so that is cuts through waves. Yet I have also made the bow slightly full to give reserve buoyancy so that it does not dig in overly if pushed too far. There is a degree of rocker to allow easier tacking. The stern is a compromise between a wide planing stern, and a narrower stern that gives low drag at lower hull speeds. The flare angle is modest so that I should be able to use strong paddle strokes something not possible with too much flare. My general feeling is that it is a reasonably good shape and shoud do what I want it to do fairly well.
|


|
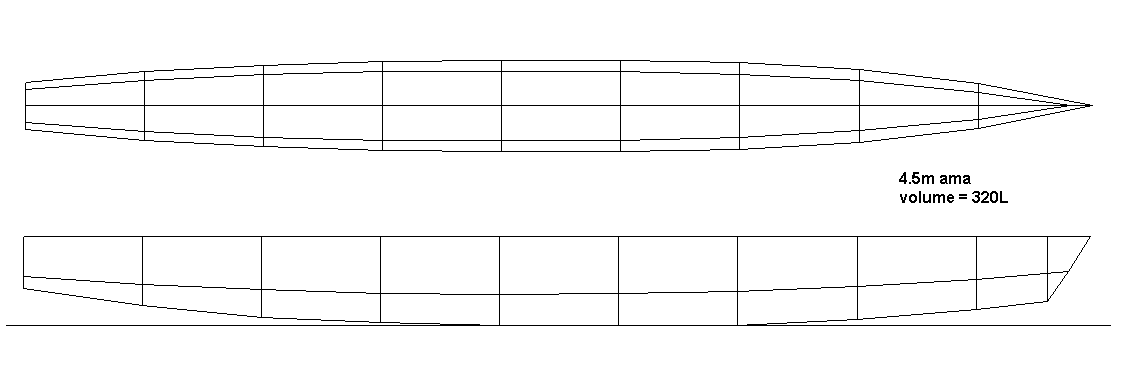
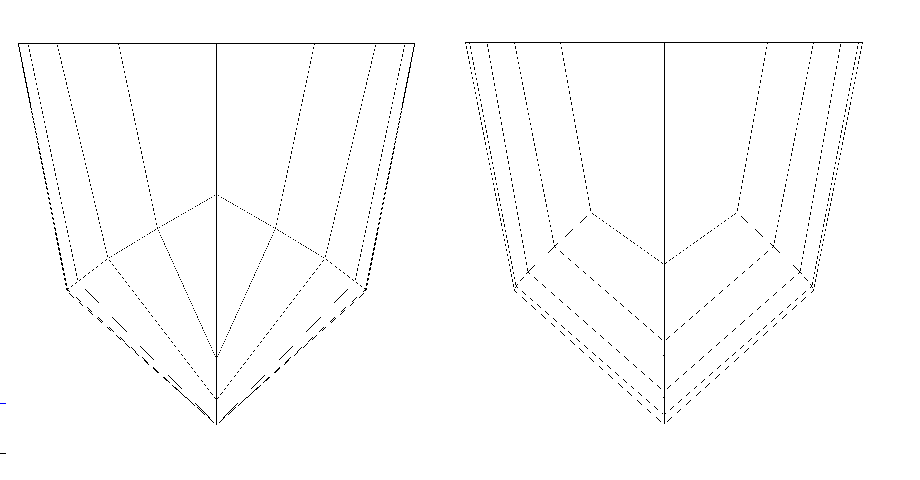
Details of ama
|
| Home |